 Today we’re going to go over a super simple CSS technique that you can use to make it snow on your Blogger blog. It seems particularly attractive since it doesn't require scripts, only CSS and three small images.
An advantage of this method is that by not using scripts doesn't overload the blog, the disadvantage is that users with not so modern browsers, will not be able to see it (in Internet Explorer works for version 10 and up).
The snow will fall in the background of the blog, which, in addition, prevent interfering with links or content (because the flakes are images), also prevent blocking the visibility of the content of the blog.
You can see the demo in this test blog.
How To Add Falling Snow To Blogger Blogspot
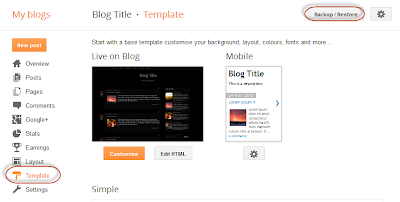
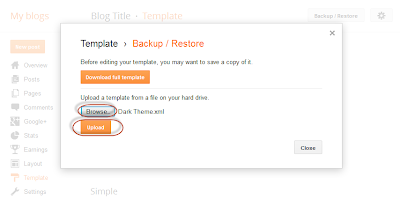
Step 1. Go to Template and click on the Edit HTML button:Step 2. Click the small arrow on the left of <b:skin>...</b:skin> to expand the style (screenshot 1), then click anywhere inside the code area to search (using CTRL + F) for the ]]></b:skin> tag (screenshot 2) and add this code just above it:
/* Snow falling for Blogger
----------------------------------------------- */
@keyframes snow {
0% {background-position: 0px 0px, 0px 0px, 0px 0px;}
100% {background-position: 500px 1000px, 400px 400px, 300px 300px;}
}
@-moz-keyframes snow {
0% {background-position: 0px 0px, 0px 0px, 0px 0px;}
100% {background-position: 500px 1000px, 400px 400px, 300px 300px;}
}
@-webkit-keyframes snow {
0% {background-position: 0px 0px, 0px 0px, 0px 0px;}
100% {background-position: 500px 1000px, 400px 400px, 300px 300px;}
}
@-ms-keyframes snow {
0% {background-position: 0px 0px, 0px 0px, 0px 0px;}
100% {background-position: 500px 1000px, 400px 400px, 300px 300px;}
}
#falling-snow {
background-image: url(https://blogger.googleusercontent.com/img/b/R29vZ2xl/AVvXsEib1KBIV0mOU8e9YUuObd2NbTKyy68uZmbiz3RJq10cMB8qRLH3LrkBMdnOYS45ynBG9vuMJT3OY_TV6D5fOMNb8TGazllvlYNDR9zMvP0UaJBsrp11DXU9bZwIn1ETnMOLh29sZOAs5WeQ/s1600/snow.png), url(https://blogger.googleusercontent.com/img/b/R29vZ2xl/AVvXsEgg0yXjsMy5I87SJgQEY-8QkHBNcMYi3Sb4_3UgBR8Dd29DNPnVqHGtkMB3ikpXgBQuQ9BaBMrBJbpKNbDuhA3mIWX3gQcpBWST4JwvRlFZc3FkC7slHMcq-wD31DrNYPCX0QtDAVcm0CTB/s1600/snow3.png), url(https://blogger.googleusercontent.com/img/b/R29vZ2xl/AVvXsEhB0XxZfGylWMM4SNRsjtQDabQgTrszmioAzUplEQImvVoKEOtTBfav4oz4SYeyTccEiaKXXahfkFHyIt-OZgYGo0vstH9wholbDXVJ3lMWKYMxI5VYwVJjFmhSMhil_hRQRxWMBAAgNdZ-/s1600/snow2.png);
-webkit-animation: snow 20s linear infinite;
-moz-animation: snow 20s linear infinite;
-ms-animation: snow 20s linear infinite;
animation: snow 20s linear infinite;
}
Screenshot 1:
Screenshot 2:
Step 3. Now, search (CTRL + F) for the <body> tag or this line:
<body expr:class='"loading" + data:blog.mobileClass'>
Step 4. And just below, add this:
<div id='falling-snow'>
Step 5. Finally, find the </body> tag (CTRL + F) and add the following just above it:
</div>
Step 6. Save the changes and that's it. Enjoy!!! :)
As you can see this tricks is very simple and easy to install, does not block the visibility of blog's content and the best is that it has no scripts, only CSS and nothing else.


