Updates and Bug Fixes for June 26th

Today’s Blogger release is a big one for Blogger in Draft. Let’s lead off with the quick stuff:

  • Google Gadget integration continues to improve, with better editing of gadget preferences.

  • The new look for the Dashboard has seen a handful of tweaks, including a new button style that we’re trying out and, by popular demand, the “show all blogs” toggle is now sticky.

  • The subscribe page element has been published to WWW.

  • We’ve added a “Make Blogger in Draft my default dashboard” to the Blogger in Draft dashboard, so now you don’t have to remember to type “draft.blogger.com” instead of “www.blogger.com.”

  • So you can easily keep up with the news, we’ve added this blog as a tab on the Blogger in Draft Dashboard.

But that’s not what you came here for. You wanted this:

  • Webmaster Tools Verification. Turn this on to automatically add and verify all your blogs on Google’s Webmaster Tools.

  • Star ratings. Add a 0–5 star rating control to the bottom of your posts so that your readers can rate them.

  • Import / export of blogs. Back up all of your posts and comments to one Atom XML file on your computer, and import your posts from one blog to another.

  • Embedded comment form. By incredibly popular demand, we’ve brought the comment form to your blog’s post pages, with support for Google Account and OpenID authentication.

  • New post editor. We’ve completely revised the post editor, bringing in drag-and-drop image placement and better HTML handling.

As always, these features are on Blogger in Draft because we’re not done with them and we’re looking for your feedback. Please read the posts for each of the features before trying them so that you know what’s working and what isn’t. Make sure you leave comments! These are big features for us, so we want to get them right before we turn them on for everyone.

New Feature: New Post Editor


Today we’re releasing the first iteration of a completely new version of the Blogger post editor. This editor is more stable, compatible, predictable, and will help us bring more functionality to posts on Blogger over the coming months and years.


Out of the gate you’ll notice two areas where the new editor improves significantly over Blogger’s current editor: images and raw HTML.


One important quick note before we get into those, however: Autosave is currently disabled in the new post editor. We’ll turn it on in an upcoming release, but for now it’s off. You’ll want to periodically remember to save your drafts when using this editor.
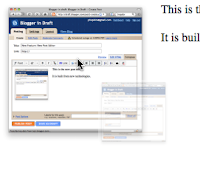


On to the fun stuff!


Improved Image Handling

When you upload an image to the new post editor it will appear as a thumbnail in the image dialog box. That way, you can upload several images at once, and then add them into your post at your convenience. The thumbnails will be available until you close the post editor.


When you add an image from the dialog into your post it will be placed at the insertion point instead of at the top of the post.


If you don’t like where an image is in your post, you can drag it around to another spot. If you drag it towards the left side of the editor it will float to the left, likewise for the right, and if you leave it in the center it will be centered. You can drag the image between paragraphs and other block elements. Unlike in the current editor, dragging in the new editor preserves the link to the full-size version of the image.


You can easily resize or remove an image with the image size “bubble.” Click on the image (Firefox 3 users may need to double-click) to bring up the bubble, and resize the image instantly. You can resize any image, including ones added by URL, but if you resize an image that was uploaded through the post editor we resample the image on our servers to keep the download size small.


It might be easier to see this in action, so we made a short video to show off some dragging and resizing:


Improved Raw HTML

If you use Edit HTML, especially to add tables and other advanced HTML to your posts, you should find that the new editor has a number of enhancements to make the experience less frustrating, or, dare we say it, even pleasant.


By default, the current post editor replaces any newlines in your post with <br> tags. This can cause problems when you want to use newlines to make table or list HTML clearer, since the inserted <br>s will mangle the formatting significantly. The new post editor does not introduce <br>s within tables, lists, scripts, styles, preformatted blocks, or objects.


Since they won’t destroy the formatting, the new post editor adds clarity newlines to the HTML that’s generated by Compose mode. For example, if you create a list in Compose mode and then look at it in Edit HTML, you’ll see that there are newlines before each of the <li> tags.


For posts made with the new editor, the blog-level “Convert line breaks” setting (from Settings > Formatting) is ignored. Instead, newline behavior is controlled by an Edit HTML setting under “Post Options,” which affects how newlines and <br> tags are displayed in the Edit HTML editor. This means that, unlike “Convert line breaks,” you can change newline behavior when it would be useful for a given post without affecting the display of all the other posts on your blog.


We’ve also added a Compose mode setting to let you choose what happens when HTML tags are typed in to the Compose editor. The default, “Interpret typed HTML,” matches the current post editor’s behavior: typing “<b>bold</b>” into the editor would look like this in your post: bold. If you change the setting to “Show HTML literally” instead, you’ll get: <b>bold</b>.


The Edit HTML and Compose settings, along with the choice of whether to show Edit HTML or Compose by default, are saved per-user, per-blog and are updated when you save a post. The Edit HTML setting defaults to the value of the blog’s “Convert line breaks” the first time you open the new editor.


Other New Features

You’ll find other new functionality here and there in the new editor. Here are a few more highlights:


  • Easy link editing in Compose mode. Just click a link and you’ll have the option of changing its URL or removing the link.

  • Full Safari 3 support on both Windows and Macintosh. The old editor is pretty quirky on these browsers, but the new editor works as you’d expect.

  • New Preview dialog that shows your post in a width and font size approximating what you’d see on a blog.

  • Placeholder image for <object> tags (such as those from video embeds) so that you can see and drag them around Compose mode.


Currently Missing Features

Besides the aforementioned autosave, there are a handful of other features from the current post editor that are on our to-do list for the new editor. If you rely on any of these, you may not want to use the new editor for everything just yet.


  • Spellcheck

  • Video upload

  • Hindi transliteration

  • Bi-directional text controls

  • Toolbar for Edit HTML mode

  • FTP file upload

  • Enclosures


Be patient: these will all come to the new editor over the upcoming weeks. Look for announcements on this blog.


Known Issues

We’ll be adding to these in the comments, probably, but here are a few little problems you might run into right now:


  • The “Blockquote” button is unreliable in Internet Explorer 6.

  • Lists and other block elements may get an additional blank line above them, which can be removed after re-editing the post.

  • You cannot add more items to a list if you toggle from Compose to Edit HTML and back, or re-edit the post. As a workaround, add new <li> tags in Edit HTML mode.

  • Bold and italic keyboard shortcuts do not work in Safari, and the publish and save keyboard shortcuts are not implemented in any browser.

  • The site-specific modification that Opera added to enable the old rich text editor does not work with the new editor. We’re investigating adding official support for the new editor under Opera 9.5.

  • All images uploaded through the new editor will go to Picasa Web Albums, even for FTP blogs. Images will not get uploaded to your blog’s FTP server.

  • Image upload will not work for accounts that have not accepted the image upload Terms of Service. Upload an image through the old post editor to get the opportunity to view and accept the ToS.

  • Internet Explorer 5.5 is no longer supported.


We hope that the above issues and missing features will not prevent you from at least giving the new post editor a try.


This editor will, when it’s ready, replace the current post editors across all of Blogger. Therefore, we really appreciate your feedback and especially reports of bugs and other strange behavior that you find. We’d like to address them all now so that things will go smoothly when we turn the new editor on for everybody.

New Feature: Import and Export

Today’s release brings another long-desired feature to Blogger: Import and Export of blogs. Now you can export all of your posts and comments into a single, Atom-formatted XML file for easy backup. You can then import the posts back into Blogger, either into an existing blog or into a new one.

To export your blog, log in to http://draft.blogger.com/ and go to the Settings > Basic page. You’ll see the Blog Tools links at the top of the page for importing and exporting. (We also moved blog deletion up here from the bottom of the page. Don’t worry about accidentally clicking it, though; your blog wouldn’t be deleted until you confirmed on the next page.)

Once you click “Export blog” and press the “Export” button on the next page, your browser will prompt you to save the XML file for your blog. Keep it somewhere safe as a backup, or import it into a different blog. You can import one blog into another from the Blog Tools links, or when creating a new blog. Look for the “Advanced Options” at the bottom of the page.

When you import a blog, all of the posts will get saved in an “imported” state. From there you can publish just a few, or all of them at once. Here are some ideas for what you can do with importing and exporting:
  • Merge two or more blogs into one. Take the exported posts and comments from one blog and import them into another one.
  • Move individual posts from blog to blog. After importing, select just a set of posts to publish and publish them with one click.
  • Back up your blog to your own storage. You can keep your words safe and under your control in case anything happens to your blog, or us, or if you want to remove them from the Internet.
  • Move your blog somewhere else. Our export format is standard Atom XML. We hope to see other blogging providers extend their Atom support to include import and export. And, if you decide to come back to Blogger, importing your export file will get you back up and running in seconds.
Caveats
  • The export format currently only covers blog posts and comments to those posts, not blog settings or templates. To back up a Classic template, copy and paste the template code from the editor. To back up a Layouts template, use the Backup / Restore template option to download a copy of your template.
  • Before importing a blog for the first time, we recommend that you create a new, throwaway blog to import into so you get a sense for how the process works. Once you’re comfortable, import into your public blog.
  • At the moment there is a 1MB size limit on the blog you can import. This is a bug that we are correcting the issue.
Have you imported or exported your blog? Let us know about how it went in the comments.

New Feature: Embedded Comment Form

One of the most common complaints about Blogger’s comment form is that it’s on a separate page from the post, styled in a way that doesn’t match the blog. Our new embedded comment form addresses that by putting the comment form where your readers expect it: at the bottom of the post.


To turn on the embedded comment form, log in to http://draft.blogger.com/ and go to Settings > Comments for your blog. You’ll see that the “Show comments in a popup window?” setting has been replaced with the new “Comment Form Placement” setting. Just click “Embedded below post,” save your settings, and go check out a post to see your new comment form.

Additional Features

  • The comment form works with Google Accounts, OpenID authentication, name / URL, and anonymous identities. As with the current comment form, we’ve set up shortcuts for a handful of common OpenID providers.

  • Once you log in with a Google Account for one blog, you won’t have to log in to comment on other blogs during your browser session. Nevertheless, to protect your privacy, we use an <iframe> to keep your logged-in identity inaccessible to the blog itself.

  • If you have a “Comment Form Message” set up, we put it on the post page above the comment form.

  • If you require word verification for commenting on your blog, we’ll show the word verification form in a small dialog after you click “Post Comment.”

  • Update, 6/27: The embedded comment form works with Classic templates. The <$BlogItemCreate$> tag will add the right HTML to your page.


Caveats

  • If you’ve edited your template for the blog widget, you won’t automatically pick up the new code for the comment form. You’ll need to either reset the template by deleting the contents of the <b:widget id='Blog1' locked='true' title='Blog Posts' type='Blog'> element (backup your template first!) or copy the code from an unmodified blog. Update, 6/27: Amanda from Blogger Buster has written a howto post for updating a modified blog widget template

  • The font color of the comment form is currently hard-coded to black. If your template has a dark background, this may make the “Comment As:” label hard to read.

  • The embedded comment form currently does not support subscribing to follow-up comments via email, nor does it have a preview button.

How’s it working for you? Anything else you’d like to see? Does the comment form look particularly good or bad in your template?


Let us know in the comments, now with convenient embedded comment form technology.

Webmaster Tools for Blogger

Ever wonder why your blog shows up where it does in the Google search rankings? With our new Webmaster Tools integration that information is just a click or two away.


Webmaster Tools is a Google service that provides you with detailed information about your website’s visibility to Google’s search engine. You can see how often Google’s web crawlers visit your site, find out who links to your site, what searches are used to find your site, and even control how your page appears in the Google web results.


We’ve added a new link from the Blogger in Draft dashboard to take you directly to Webmaster Tools. If you follow it, we’ll add all your blogs to Webmaster Tools and verify them for you automatically. From there, you can poke around and learn about how Google search sees your blog.


You can learn more about Webmaster Tools at Google’s Webmaster Help Center.


As always, your comments and feedback are extremely important to us and we hope you’ll give this feature a test drive.

New Feature: Star Ratings

With our new Star Ratings feature, your readers can easily rate your posts or the things you post about — from one star to five stars with a single click, right from the post footer.

Think of Star Ratings as a mini-poll for each of your posts. If you blog about fashion, food, crafts, quotes, or art we think this will be particularly useful to you.

To enable Star Ratings, log it to http://draft.blogger.com/ and go to your Layouts page. From there, click the “Edit” link for the Blog Posts page element and then check the “Show Star Ratings” checkbox.

You can customize the location of the stars within the post by dragging the preview around in the “Arrange Items” box.

Additional Notes
  • This is a Layouts-only feature. If you’re using a Classic template you’ll need to upgrade to Layouts to add Star Ratings.
  • The star ratings widget should blend seamlessly with most solid-colored blog backgrounds (one exception is Rounders, where the edges of the widget will be visible via a color change). The text and background colors for the ratings are taken from the following skin variables:
    • Foreground: textcolor, textColor
    • Backrgound: mainBgColor, bgcolor
  • If you have customized your blog widget’s template you may not see the Star Ratings. You will need to either reset your blog widget’s template or copy the Star Ratings code from a fresh template.
What do you think? Leave a comment, or just rate this post!

New Feature: Posting Gadget for iGoogle

Today we’re launching a draft version of the Blogger Posting Gadget for iGoogle. With this gadget, you can write, save, and publish posts to any of your Blogger blogs directly from iGoogle.


Interested? Try it now: Add to Google


Make sure you’re signed in with the same Google account you use on Blogger in order to start posting.


Currently, the gadget supports the following:

  • Editing the HTML of title, body and labels

  • A drop-down menu to select from multiple blogs (if you have them)

  • The ability to publish a post immediately, or save it back to Blogger as a draft post


Tip: If you start writing a post in HTML and decide that you want image uploading or other rich text features, just click “Save Draft.” The gadget will save the post, then give you a link to directly edit the post in Blogger.


Some compatibility notes:

  • The Blogger posting gadget will only work in iGoogle, not in other gadget containers, because it requires authenticating with your google.com cookie. We hope to remove this restriction in the future.

  • Since this gadget uses the JavaScript Google Data API for Blogger, it does not work in Apple’s Safari browser. We hope to fix this in the future as well.

  • We’re also hearing reports that the gadget is not working correctly in Internet Explorer. We’re looking into this. Now works in Internet Explorer; you may need to remove and re-add the gadget to pick up the fix.


While there’s still a bit we’d like to do with the gadget, we want to announce it first on Blogger in Draft to get your feedback. Some of the improvements we’re considering are:

  • Availability in all of Blogger’s supported languages

  • Auto-completion for labels

  • Autosaving of posts


  • Rich text editing

What’s on your list? Let us know in the comments.


Update, 3:15PM: Added compatibility note about Internet Explorer.

Update, 6/10: Fixed to work in Internet Explorer.

New Feature: New Dashboard

Our old dashboard was getting a little cramped, so we reorganized things and gave everything a fresh, new look. You can see this now by logging in to Blogger in draft.

The new dashboard contains all of the same information that the old one did, but rearranged to emphasize the most important content and changes (and with a little more room for future goodness).

By default, only some of your blogs are shown in the dashboard, although there’s a link you can click to display all of them. The blogs we show by default include the two blogs you most recently published to, as well as any with unmoderated comments or ToS/spam warnings.

Please try this out and let us know what you think in the comments! Your feedback is an important part of our design process and we’d like to know what you think before we release this re-design out into the wild.

Remember: Not sure where some of your blogs went? Click the “Display all blogs” link at the bottom.

Blogger in Draft Bug Fixes for June 6th

Today we have a couple of new features (more on those later in the day) and some bug fixes. We’ve also published Blog List, so it’s now available to everyone on the main Blogger site.

Here are the highlights:
  • The Google Gadget page element configuration has been greatly improved. We’ve fixed a number of cosmetic and functionality issues in this area. Try it out with the new unified Gadget and Page Element directory.
  • Adding feed URLs to a Blog List directly now works reliably for all supported feed types.
  • Adding a blog with no detected feed to a Blog List now triggers a warning dialog and icon.
Everything working ok for you? Let us know in the comments.