How to add “Email Subscription Form” to Blogger Blogspot

email subscription form, blogger blogspot, gadgets
When you are providing useful information in your blog, then many times some readers will need to get the latest updates from your blog. For that purpose, you need an Email Subscription Form in your blog, so that the interested visitors can easily get the latest updates.


To add email or Feed Subscription Form to your blogger blog (blogspot) is very easy.
Just follow the next steps:

1. Log in to Blogger, then go to Layout > click on "Add a Gadget" link:


 2. From the pop-up window, scroll down and click on the "HTML/JavaScript" gadget:


 3. Paste the following code inside the empty box:
<style>
.hl-email{
background:url(https://blogger.googleusercontent.com/img/b/R29vZ2xl/AVvXsEj1fqULeJ8pOpqpLHoXSRbHY2Xqk-_09RsiQTJVPj8b2JHakVKOl0-BHgZL_lXdVtEKwh6OonA7nr5j2bjb7ne4cA2i6iTHX_mUuSXcHRmCaw8mLfiu5td9MUAeXLJWnWhangeNgkF8tjc/s1600/mail.png) no-repeat 0px 12px ;
width:300px;
padding:10px 0 0 55px;
float:left;
font-size:1.4em;
font-weight:bold;
margin:0 0 10px 0;
color:#686B6C;
}
.hl-emailsubmit{
background:#9B9895;
cursor:pointer;
color:#fff;
border:none;
padding:3px;
text-shadow:0 -1px 1px rgba(0,0,0,0.25);
-moz-border-radius:6px;
-webkit-border-radius:6px;
border-radius:6px;
font:12px sans-serif;
}
.hl-emailsubmit:hover{
background:#E98313;
}
.textarea{
padding:2px;
margin:6px 2px 6px 2px;
background:#f9f9f9;
border:1px solid #ccc;
resize:none;
box-shadow:inset 1px 1px 1px rgba(0,0,0,0.1);
-moz-box-shadow:inset 1px 1px 1px rgba(0,0,0,0.1);
-webkit-box-shadow:inset 1px 1px 1px rgba(0,0,0,0.1); font-size:13px;
width:130px;
color:#666;}
</style>
<div class="hl-email">
Subscribe via Email <form action="http://feedburner.google.com/fb/a/mailverify" id="feedform" method="post" target="popupwindow" onsubmit="window.open('http://feedburner.google.com/fb/a/mailverify?uri=helplogger', 'popupwindow', 'scrollbars=yes,width=550,height=520');return true">
<input gtbfieldid="3" class="textarea" name="email" onblur="if (this.value == &quot;&quot;) {this.value = &quot;Enter email address here&quot;;}" onfocus="if (this.value == &quot;Enter email address here&quot;) {this.value = &quot;&quot;;}" value="Enter email address here" type="text" />
<input type="hidden" value="helplogger" name="uri"/><input type="hidden" name="loc" value="en_US"/>
<input class="hl-emailsubmit" value="Submit" type="submit" />
</form>
</div>

Settings 
  • Replace the url address in green to change the email icon
  • Increase/Decrease the 130 width value for a wider text area
  • Replace http://feedburner.google.com/fb/a/mailverify?uri=helplogger with your Feedburner Email Feed link. You can get it by visiting your feedburner account then navigate to Publicize and then to Email Subscriptions.
  • Replace helplogger with your feed title. It appears at the end of your feed link. In my case it is http://feedburner.google.com/fb/a/mailverify?uri=helplogger

4. Now Save your widget and check your blog. Enjoy!

Add Floating Social Media Sharing Buttons To Blogger

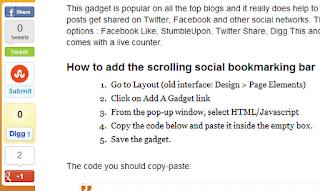
The Floating Social Media Sharing is a very popular widget on all the top blogs, being a very good way to increase the number of times your posts get shared on Twitter, Facebook and other social networks. It has some of the following functions: Facebook Like, StumbleUpon, Twitter Share, Digg This, Google+ and RSS Feed Icon and each of them comes with a live counter. You can add more sharing buttons or social bookmarking icons later if you wish.

Blogger, WordPress, Facebook, Share

How to add the scrolling social bookmarking bar


The code to copy-paste (updated!):

<!-- floating share bar Start helplogger.blogspot.com--> <style type="text/css"> #pageshare {position:fixed; bottom:5%; margin-left:-721px; float:left; border-radius:5px;-moz-border-radius:5px;-webkit-border-radius:5px;background-color:#fff;padding:0 0 2px 0;z-index:10;} #pageshare .sbutton {float:left;clear:both;margin:5px 5px 0 5px;} .fb_share_count_top {width:48px !important;} .fb_share_count_top, .fb_share_count_inner {-moz-border-radius:3px;-webkit-border-radius:3px;} .FBConnectButton_Small, .FBConnectButton_RTL_Small {width:49px !important; -moz-border-radius:3px;/*bs-fsmsb*/-webkit-border-radius:3px;} .FBConnectButton_Small .FBConnectButton_Text {padding:2px 2px 3px !important;-moz-border-radius:3px;-webkit-border-radius:3px;font-size:8px;} </style> <div id='pageshare' title="Get this from Helpblogger.com">
<div style="margin-left:8px;"><div class='sbutton' id='like' style='margin: 5px 0 0 5px;'><script src='http://connect.facebook.net/en_US/all.js#xfbml=1'></script><fb:like layout='box_count' show_faces='false'></fb:like> </div></div>
<br /><div class='sbutton'><a class='twitter-share-button' data-count='vertical' data-via='Helplogger' expr:data-counturl='data:blog.url' href='http://twitter.com/share' rel='nofollow'>Tweet</a><script src='http://platform.twitter.com/widgets.js'; type='text/javascript'></script>
<br /><div class='sbutton' id='su'> <script src="http://www.stumbleupon.com/hostedbadge.php?s=5"></script> </div> <div class='sbutton' id='digg' style='margin-left:3px;width:48px'> <script src='http://widgets.digg.com/buttons.js' type='text/javascript'></script> <a class="DiggThisButton DiggMedium"></a> </div> <div class='sbutton' id='gplusone'> <script type="text/javascript" src="https://apis.google.com/js/plusone.js"></script> <g:plusone size="tall"></g:plusone></div><br/><a href='http://feeds.feedburner.com/helplogger' rel='nofollow' target='_blank' title='Subscribe To Our Rss Feed'><img src='https://blogger.googleusercontent.com/img/b/R29vZ2xl/AVvXsEiXTEabNNvtBcT7Tvif5NTBOU7MdxJOu0EhaRXifyECNKzUyWFNjesx-pGqa5V9ocnSxo3ZCj_tPpjSckWELdPXdwfBqJtJ-YUYQAr35VPLpO3hSnEhm8ck9r3H62jWtZZqJEof7f5S2HFH/s1600/icon_rss_reader.png'/></a><div style="clear: both;font-size: 9px;text-align:center;">Get <a style="color: #3399BB;" href="http://helplogger.blogspot.com/">widget</a></div><!-- Do not remove this link --> </div> <!-- floating share bar End --></div>


Customization:
  • Vertical alignment - Change the value of bottom in code line 3. The code positions the button relative to the bottom of your browser window. To fix the distance even when window is resized, specify the value in px (pixels) instead of %.
  • Horizontal alignment - Change the value in red of margin-left. Negative value pushes the button to the left of the main blog column, positive value pushes it to the right. Increase or decrease the value based on your needs.
  • Twitter setting - Replace Helplogger with your Twitter username
  • Replacing and removing buttons - You can replace existing buttons with your own. Each button is represented by this code: <div class='sbutton'> BUTTON CODE HERE </div>
  • RSS Feed - Change the text in blue with the url address of your RSS feed.
Enjoy :)