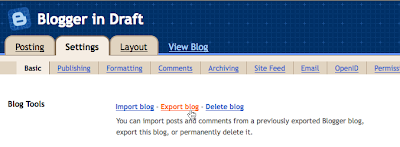
To export your blog, log in to http://draft.blogger.com/ and go to the Settings > Basic page. You’ll see the Blog Tools links at the top of the page for importing and exporting. (We also moved blog deletion up here from the bottom of the page. Don’t worry about accidentally clicking it, though; your blog wouldn’t be deleted until you confirmed on the next page.)
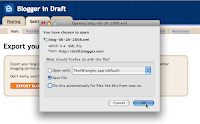
 Once you click “Export blog” and press the “Export” button on the next page, your browser will prompt you to save the XML file for your blog. Keep it somewhere safe as a backup, or import it into a different blog. You can import one blog into another from the Blog Tools links, or when creating a new blog. Look for the “Advanced Options” at the bottom of the page.
When you import a blog, all of the posts will get saved in an “imported” state. From there you can publish just a few, or all of them at once. Here are some ideas for what you can do with importing and exporting:
- Merge two or more blogs into one. Take the exported posts and comments from one blog and import them into another one.
- Move individual posts from blog to blog. After importing, select just a set of posts to publish and publish them with one click.
- Back up your blog to your own storage. You can keep your words safe and under your control in case anything happens to your blog, or us, or if you want to remove them from the Internet.
- Move your blog somewhere else. Our export format is standard Atom XML. We hope to see other blogging providers extend their Atom support to include import and export. And, if you decide to come back to Blogger, importing your export file will get you back up and running in seconds.
- The export format currently only covers blog posts and comments to those posts, not blog settings or templates. To back up a Classic template, copy and paste the template code from the editor. To back up a Layouts template, use the Backup / Restore template option to download a copy of your template.
- Before importing a blog for the first time, we recommend that you create a new, throwaway blog to import into so you get a sense for how the process works. Once you’re comfortable, import into your public blog.
- At the moment there is a 1MB size limit on the blog you can import. This is a bug that we are correcting the issue.


