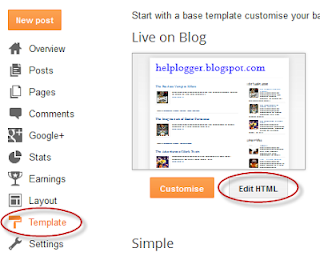
This hack will summarize content and show only summary in Home page, Archives Page and Label Page using Automatic Read More simple script in your template. Using automatic read more on your blog will make your blog load faster by showing few post instead of the full post on the homepage.
Automatic read more for blogger posts can be done by inputting some code into your blog templates.
How to install Automatic Read More Hack for Blogger There are two options you can choose from:
1. Auto readmore for all the posts:
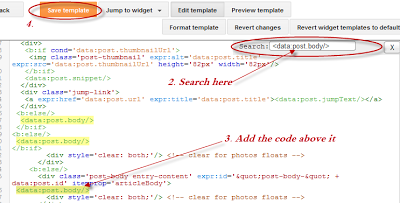
Step 1. Find (CRTL + F) this code:
<data:post.body/>
Step 2. And replace with this:
<b:if cond='data:blog.pageType != "item"'>
<b:if cond='data:blog.pageType != "static_page"'>
<div>
<b:if cond='data:post.thumbnailUrl'>
<img class='post-thumbnail' expr:alt='data:post.title' expr:src='data:post.thumbnailUrl' width='72px' height='72px'/>
</b:if>
<data:post.snippet/>
</div>
<div class='jump-link'>
<a expr:href='data:post.url' expr:title='data:post.title'><data:post.jumpText/></a>
</div>
<b:else/>
<data:post.body/>
</b:if>
<b:else/>
<data:post.body/>
</b:if>
2. Read more only for older posts (your latest post will appear normal):
Find (CTRL + F) and replace
<data:post.body/> with:
<b:if cond='data:blog.pageType != "item"'>
<b:if cond='data:blog.pageType != "static_page"'>
<b:if cond='data:blog.url == data:blog.homepageUrl'>
<b:if cond='data:post.isFirstPost == "true"'>
<data:post.body/>
<b:if cond='data:post.hasJumpLink'>
<div class='jump-link'>
<a expr:href='data:post.url + "#more"' expr:title='data:post.title'><data:post.jumpText/></a>
</div>
</b:if>
<b:else/>
<div>
<b:if cond='data:post.thumbnailUrl'>
<img class='post-thumbnail' expr:alt='data:post.title' expr:src='data:post.thumbnailUrl' width='72px' height='72px'/>
</b:if>
<data:post.snippet/>
</div>
<div class='jump-link'>
<a expr:href='data:post.url' expr:title='data:post.title'><data:post.jumpText/></a>
</div>
</b:if>
<b:else/>
<data:post.body/>
</b:if>
<b:else/>
<data:post.body/>
</b:if>
Settings:
A. If you want the thumbnail to appear on the left:Step 1. Find (CTRL + F) the following piece of code:
]]></b:skin>
Step 2. Just above it, paste this code:
.post-thumbnail{float:left;margin-right:20px}
B. If you want the thumbnail to appear on the right,
Paste above
]]></b:skin> this code:
.post-thumbnail{float:right;margin-left:20px}
Click
Preview and if it works, click
Save Template.
That's it, enjoy!


